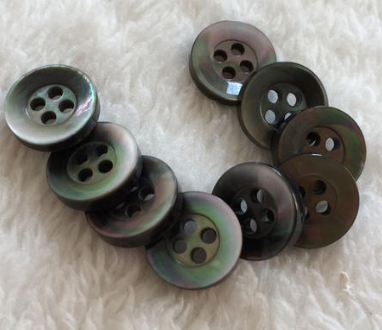
Button easy to fall off how, teach you a few tricks
A lot of buttons are very nice, some are practical, some are decorative. However, if a button falls off, it will become less beautiful or even embarrassing. Buttons are often used in clothes. However, in the process of use, it is inevitable to encounter the situation of button sliding, which leads to some inconvenience. Therefore, we should strengthen the button in advance before the button sliding, so as to avoid the button sliding
1. For some buttons that need to be sewn with needle and thread, we can hang off the edge of the button with a knife to make it smooth. This will reduce the friction on the buttonhole and prevent wire breakage.
2. When sewing buttons, we can tie a knot on the reverse side every two stitches, so that the button will not slip after one knot is loose.
3. For example, some buttons with four holes are nailed into the shape of "mouth" or two parallel lines, so as to avoid the cross type of "cross" as far as possible. Due to the large protrusion of the cross type after nailing, it is easy to break the thread due to friction with the outside.
Most buttons can be sewn with ordinary thread. The button should be sewn loose so that it fits into the buttonhole side of the garment. If the button is sewn too tightly, it will be difficult to fasten. Thread buttons usually have two or four holes through which buttons can be sewn to a garment. There is a loop on the back of the loop that allows the button to be sewn to the garment.
To nail thread buttons, you need a foot winding constructor, either with a toothpick or a thick matchstick. Insert the needle into the fabric from the side of the garment where the button is to be buttoned, and insert the needle tip 3 mm out. Pull to the knot. Make two small stitches to mark the position of the button,

To lay a solid foundation for your work, buttons will cover knots and stitches.
Now put the needle through a hole in the button from the back. Let the button slide down the needle and thread onto the garment. Place the loop builder over the button. Press it with your fingers and sew it up like a button.
The stitches should be aligned with the design position of other buttons. Three to six stitches are sewn into each pair of holes, depending on the strength the button will bear. Then push the needle up through the fabric, but not through the button.
Push the needle through the fabric to the opposite side and push it under the button seam. Pull out part of the line and make a loop. Pass the needle through the loop and take the thread to form a knot. Cut the thread to the knot.
First, insert the needle from the side of the garment to be buttoned, and prick the needle tip upward by 3mm, and then pull the thread to the knot position. Sew out two small stitches to mark the position of the button to lay a solid foundation for your work. Buttons will cover knots and stitches.
Place the button at the mark so that the foot wrap is parallel to the buttonhole. Pass the needle through the loop and down through the fabric. Four to eight stitches through the loop. Pay attention to the small and neat stitches under the clothes. I'm tying a knot. Insert the needle under the button stitch on the back of the garment. Pull out part of the line and make a loop. Pass the needle through the loop, tighten the thread to form a knot, and cut the thread against the knot.
Source: Jiangmen button factory;http://www.ruihongbutton.com
-
10-19
Jiangmen button factory teaches you how to distinguish and judge the material of button
Jiangmen button factory gives you a bunch of buttons with different colors and styles. How to distinguish and judge what button materials are made of? Jiangmen button factory is here to share and solve this problem for you.Button materials can be roughly divided into plastic (resin, plastic), metal button (copper, iron, alloy), natural (shell, wood, coconut shell, bamboo). Various materials to mak
-
10-19
Button easy to fall off how, teach you a few tricks
A lot of buttons are very nice, some are practical, some are decorative. However, if a button falls off, it will become less beautiful or even embarrassing. Buttons are often used in clothes. However, in the process of use, it is inevitable to encounter the situation of button sliding, which leads to some inconvenience. Therefore, we should strengthen the button in advance before the button slidin
-
10-19
Jiangmen button factory tells you how to choose buttons for all kinds of clothes
Jiangmen button factory is here to share and solve this problem. When choosing buttons, you should match the clothing fabrics in color, shape, weight, performance, quality and price as well as other accessories. In a garment, the amount of buttons should not be too much. It is also not advisable to use buttons to achieve decorative effect without regard to the economic and labor-saving criterion.W
-
10-19
Jiangmen button factory tells you how to pay attention to the button of custom-made suit
The customized style of professional suit has something to do with buttons and collars, so when men choose a suit style, this is also one of the factors to be considered. In other words, the style changes of suits are mainly on the collar and buttons. We know that the dress and production of custom-made suits are very particular. Therefore, the number and arrangement of buttons for tailored suits